

It hasn't snowed much here, this winter and it has been unusual warm. The little bit of snow we had, didn't stick for more than 24 hours. Northern Bavaria looks like this right now...

No snow to build a snowman with :o(, so I decided to make my own snowman out of styrofoam balls and stick it on a wreath.

Have you seen the exclusive preview here? This is actually part of a yarn-wrapped wreath. I've seen so many yarn wrapped wreaths online and I just love them. So I searched for yarn, that I liked and I found this yarn, that is, I believe, called eyelash yarn or something like that. I can't knit, so I'm not sure with the vocabulary. I googeled it and what I found looks like my yarn, so I'm just going with it.
It worked really well. Here it is, in all it's fuzzy awesomeness.

This is fairly simple to make, but I am going to show you some pictures of the process.
All you need is a styro-foam wreath, yarn and your hotglue-gun.

Well you start with a drop from your hot glue gun and start wrapping.

And then you wrap some more.

I found it the easiest to wrap the yarn loosely around the wreath and then just push it all down to one side.

But you might end up with a loop or two on the back of your wreath. Those aren't too bad, just glue them on the back with your glue gun.

Also you must be careful not to end up with holes on the outer edge of the wreath like that:

When you do it my way, the yarn isn't wrapped super tightly and these holes might appear. Control the wreath every quarter of the wreath, so you won't have any troubles. Also secure the yarn every once in a while with a drop from you glue gun.
So now, we'll move to the snow-man.
What you'll need:

- yarn-wrapped wreath
- styrofoam balls in different sizes
- white ribbon
- acrylic paint
- a brush
- glue gun
- a scrap piece of styrofoam
- black nailpolish
- some glitter (mine is the kind of see-through stuff, that glitters in different colors, but looks white in the container)
- several pushpins
- one icicle stick (not the picture)
- a scrap piece of fleece or similar (for a snow-man scarf)
- some scrap black thick felt (for the hat)
First you'll want to make the pushpins black with nail polish. If you only have those with a plastic wrapping like me, then just take it off:

And then you paint them black. I've seen this done by Vixen Made before here.

Set them aside and let them dry. Now take you styrofoam balls and cut them in half.

And then cut a little bit off of the biggest balls like this.

Do this for the smallest ball as well and the middle ball needs to be cut twice. You should do this so the three balls will come together more nicely. See?

And then you glue the back of all the balls on the icicle stick. I started with the biggest one, but be careful that the stick won't show on the top.

Now I painted it in a light blue, but you can shoose whichever color you like. I chose blue instead of the traditional white, because it will show better on the white wreath. I recommend coloring first the back side - at least around the edges - so there won't be any white showing on the other side. I painted it all of it, because the wreath is in front of a window and I would see the ugly unpainted side every time I walk out of the door.


While letting it dry, I put some white glitter on top of it. I love GLITTER, so it needed to go on there as well.
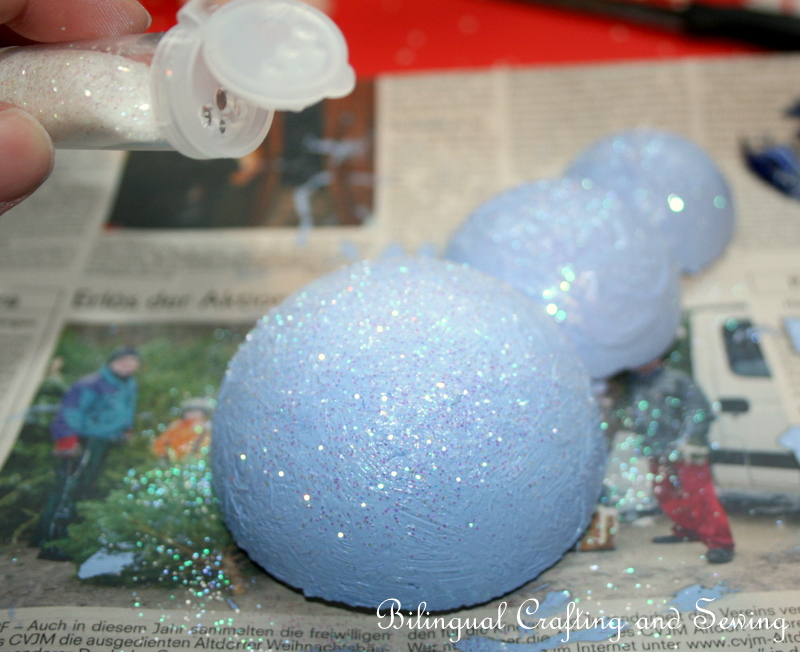
Do you notice a color difference between the two upper snow-men above? I mean the one painted only on the back and the two fully painted. It's hardly there on the photos, but the icicle stick is different, too... See that? Yeah? That is, because I'm stupid. Seriously... You see, I had some old cheap acrylic paint and tried to paint the wand you can see in this post. But it didn't dry, I mean like at all, it just got a little thicker, but that's all.. I thought this to be super weird, because I just had colored the fairy/princess wand stick with it as well and it worked just fine. After about 15 days, I just gave up and bought the same color again, because I had thought, it just was the brown that got old, after all I've painted with those colors before. But, what happened? That brown didn't dry as well.
But since, I had used the pink for the fairy wand, I thought that the blue might just be normal as well. But no, it wasn't... It didn't dry and it's really oily and weird. I'm going to thow it away so I will never be tempted to use it again. For the snow-man from the other halves of the balls, I just used more expensive acrylic paint, that I had. That's what I get for being cheap...
Now, we'll use our pushpins. They are going to be the eyes and buttons for the snowman.

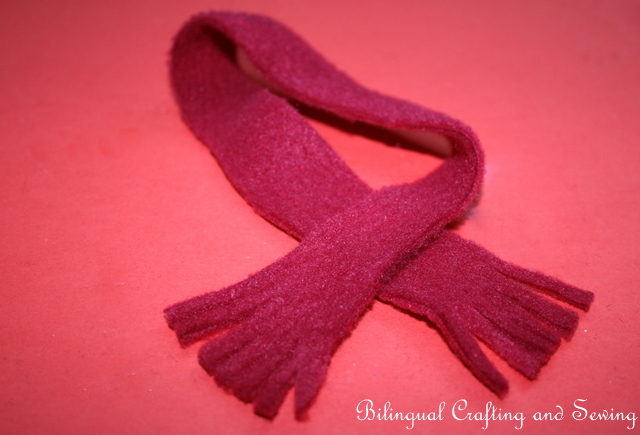
I used a long rectangular piece of fleece for the scarf and just cut slits in the ends.
For the hat, I used a rectangular piece of felt and two circles. This is all more or less eye-balling.

First roll the felt to a cylinder and glue it on the big circle. Then glue the small circle on top of the cylinder. You'll probably have to cut off some excess. And there you are. A nice top hat.

I just painted the nose on. With good acrylics, of course. ;o)

And here it is - Snowman-Winter-Wreath:

Thanks for stopping by today. If it's not too much trouble for you, I'd like for you to subscribe or follow on Google Friend Connect, please.


Wenn man nicht gerade in Österreich wohnt, dann ist es wohl genauso wie bei uns, nämlich fast schneelos. Wir hatten nur wenig und den^Schnee, den wir hatten, blieb keine 24 Stunden. So siehts bei uns grad aus. Eigentlich will ich mich gar nicht beschweren, denn es bedeutet auch freie Straßen.
Kein Schnee zum Schneeman machen :o( Also hab ich mir gedacht, mach ich einfach meinen eigenen Schneeman aus Styroporkugeln und den hau ich dann auf einen Kranz.
Habt ihr die exklusive Vorschau hier gesehen? Das ist nämlich ein Teil von einem mit Wolle umwickelten Kranz. Dafür habe ich Garn genommen, das Wimpern-Wolle oder so genannt wird. Ich kann leider nicht stricken und kenne mich daher null aus.
Hat aber super funktioniert und hier ist er in seiner kuscheligen Gesamtheit.
Das ist eigentlich ziemlich leicht. Aber ich werde euch trotzdem ein paar Stufen des Prozesses zeigen.
Also man fängt an mit einem kleinen Tropfen von der Heißklebepistole und dann wickelt man.
Und dann wickelt man einfach noch ein bisschen weiter.
Ich habs am einfachsten empfunden, als ich die Wolle ein paar Mal lose um den Kranz wickelte und dann alles nach unten auf eine Seite schob.
Aber so bekommt man dann, vielleicht, auf der Rückseite solche Schlaufen. Die muss man dann einfach wieder festkleben.
Man muss auch aufpassen, sonst hat mal solche Löcher auf der Außenseite des Kranzes.
Wenn man es so wie ich macht, dann kann es eben sein, dass man solche Löcher hat. Man sollte also immer mal wieder den Kranz angucken und die Löcher zu machen, genauso wie man dann auch immer wieder mit Heißkleber die Wolle fixiert.
So und nun zum Schneeman
Das braucht man:
- den Kranz
- Styropor-Kugeln in verschiedenen Größen
- weißes Band
- Acrylfarbe
- einen Pinsel
- Heißklebepistole
- ein übrig gebliebenes Stück Styropor (von einer Verpackung)
- schwarzen Nagellack
- Glitzer (ich hab so einen fast durchsichtigen genommen, der in verschiedenen Farben glitzert, aber weiß in dem Döschen aussieht)
- Reißzwecken
- einen Eisstiel (nicht im Bild, kann man kaufen)
- ein Reststückchen Fleece oder Ähnliches (als Schal, nicht im Bild)
- ein Reststück etwas dickere Filz (nicht im Bild, für den Hut)
Die Reißzwecken einfach auf das Stück Styropor stecken und schwarz anmalen. Das habe ich schon Mal gesehen und zwar hier bei Vixen Made.
Und jetzt beseite legen und trocknen lassen. Danach schneidet man die Styropor-Kugeln in der Mitte durch.
Beim größten Ball schneidet man oben ein Stück, wie im Bild, ab.
Das macht man auch für den kleinsten Ball, beim mittleren schneidet man oben und unten etwas ab. Das macht man, damit die Bälle bündiger abschließen.
Und dann klebt man das Eisstäbchen hinten auf die Halbkugeln drauf. Ich hab mit dem größten angefangen, aber Vorsicht, dass das Eisstäbchen nicht oben rausguckt.
Jetzt malt man den Schneeman an. Ich habe mich für hellblau entschieden, weil sich das mehr vom weißen Kranz abhebt. Man kann aber wählen was man will.
Während der Schneemann noch trocknete, habe ich den dann auch mit Glitzer bestreut.
Seht ihr den Farbunterschied bei den beiden Schneemännern oben? Also ich mein, den der kaum angemalt ist und die zwei voll ungemalten Ja? Der ist da, wirklich, nur kaum zu sehen und der Unterschied ist da, weil ich blöd bin. Wirklich... Also ich hatte alte billige Acrylfarbe mi der habe ich versucht, den Zauberstab von diesem Post andzumalen. Aber leider wurde es überhaupt nicht trocken. Die Farbe wurde nur etwas dicker in der Konsistenz. Ich fand das komisch, obwohl ich kurz vorher die Farbe für den Prinzessinnenstab verwendet hatte und da war alles ok. Nach 15 Tagen, hab ich dann aufgegeben und die Farbe noch Mal neu gekauft, weil ich dachte das braun wäre einfach nur alt und schlecht geworden. Aber was ist passiert das Braun war auch nicht. Nachdem aber das rosa für den Prinzessinenstab funktioniert hatte, dachte ich das Blau sei normal, aber das war es leider nicht. Es war auch ganz ölig und komisch. I werde die Farbe jetzt einfach wegschmeißen, sodass ich nicht mehr in Versuchung gerate es zu benutzen. Jetzt habe aus den anderen Hälften einen neuen Schneemann gemacht und etwas teurere Farbe benutzt und die war gut.
Jetzt kommen die vorhin angemalten Reißzwecken zum Einsatz. Die dienen nämlich als Augen und Knöpfe des Schneemanns.

Für den Schal habe ich einfach ein Stück längeres Fleece abgeschnitten und die Enden eingeschnitten:
Den Filzhut habe ich aus drei Teilen gemacht. Zwei Kreisen und einem Rechteck.
Das ist eigentlich nicht schwer. Am Besten ist es, wenn man mit dem Rechteck anfängt und es zu einer Rolle formt. Die Rolle dann auf den großen Kreis kleben und den kleineren oben auf die Rolle. Den kleineren Kreis muss man dann noch etwas zu schneiden. Und schon hat man einen super Zylinder.
Ich hab die Nase einfach aufgemalt. Natürlich mit den guten Acrylfarben.
Und hier ist er. Ein Schneemann-Winter-Kranz.
Danke fürs vorbei kommen. Wenns euch nicht zu viel ausmacht, würde ich es toll finden, wenn ihr meinen Feed abonnieren würdet oder Freund über Google Friend Connect werdet.

Thank you for linking up last week for Show Your Stuff, I have this weeks edition up and running:
AntwortenLöschenhttp://juliejewels1.blogspot.com/2012/01/show-your-stuff-6.html
brightens up the winter landscape...a fun project!
AntwortenLöschenI am your newest follower..pls follow back if you can!
I love your snowman wreath! So cute! I found you through Nifty Thrifty Things. Thanks for sharing! :)
AntwortenLöschenCute snowman wreath! What an inexpensive way to spruce up your door and get a snowman at the same time.
AntwortenLöschen--Denise at Sly Needle
This is so cute. I love snowmen! I'm hosting a Winter Wonderland linky party and would love it if you linked this up!
AntwortenLöschenwww.serendipityandspice.blogspot.com
-Melissa
Love to see your new Print/PDF button - and the wreath turned out really cute. Love that fluffy yarn - at least it looks like snow! Northern Bavaria looks an awful lot like Central Illinois - we are missing our usual snowy weather. We built one snowman who "lived" for 3 hours one afternoon before melting :(
AntwortenLöschenIt's so amazing that I can "see" Germany from the comfort of my couch! Glad the new button worked!
Looks all warm and snuggly.
AntwortenLöschenAwww what an adorable wreath. I love it! :) Thanks for stopping by my blog and taking the time to comment.
AntwortenLöschensuch a unique wreath !
AntwortenLöschenVery nice! I'd love for you to link up to my newThematic Thursday meme. The theme this week is Winter and this would be a perfect addition. I'm a new follower now!
AntwortenLöschenI love how you improvised-Since there was no snow to make a snowman, you did so in another way :) And what an adorable wreath you created!
AntwortenLöschenThat is perfect! I was wondering how you got the wreath to look so fluffy and now I see it's the yarn. Very clever. I am stumbling this post. I am a new follower visiting from thirty Handmade Days. Vicky from Mess For Less
AntwortenLöschenToo cute! Thanks for sharing at Shine on Fridays!
AntwortenLöschenWe got a dusting of snow this morning but not enough to build a snowman. This is a cute alternative! Thanks for sharing!
AntwortenLöschen~Tonia @TheGunnySack.com
such a cute wreath! Thanks for linking up to the Tuesday Talent Show! I hope to see you again next week!
AntwortenLöschen-Nikki
Chef in Training
www.chef-in-training.com
What a cute idea.. Love the snowman.. Thanks for linking up at Friday fun party.. :)
AntwortenLöschen