Mittwoch, 14. Dezember 2011

Day 6 through 14

Hi,
Schon mal im voraus Tag 6 und 7 sind nicht selbst gemacht. Dafür aber ab 8-10 auf alle Fälle.


Tag  6
Tag 6 ist etwas, das habe ich auf dem Nürnberger Christkindlesmarkt gekauft.

Solche Nikolausmützen kann man da jedes Jahr kaufen und immer wieder kommen neue Modelle hinzu. Wie in jeder anderen Stadt mit Christkindlesmarkt wahrscheinlich auch. Da gibts welche mit Glitzer, in anderen Farben oder auch mit Blinke-Lichter.
Die hier fand ich einfach super süß und meine Nichte hatte schon gesagt, dass sie eine Nikolausmütze haben will, als wir letztens mal in so nem Ein-Euro Laden waren. Die waren da aber überhaupt nicht schön, also hab ich mir gedacht, wennst eh schon in Nürnberg drin bist, kaufst halt so ne super tolle rosa Glitzer-Mütze für den Adventskalender. Ich denke aber auch, dass die Dinger nicht schwer zu machen sind. Die bestehen nur aus zwei Dreiecken, einem langen Rechteck und einem Kreis. Vielleicht mach ich nächstes Jahr mal eine selber.

Tag 7
Zwar ist t Tag 7 auch nicht selbst gemacht, dafür aber auch nicht gekauft. Diesen tollen alten Koffer habe ich von meinen Großeltern. Die können eh nicht mehr verreisen und deshalb habe ich mir gedacht, schenke ich ihn meiner Nichte. Kein tolles Geschenk? Doch, denn darin kann sie die Sachen aufbewahren, die sie im Laufe des Advents noch bekommt. Da sie leider nicht so gerne Rollenspiele spielt, die aber wichtig sind, habe ich mir gedacht, dass sie von mir Kostüme bekommt, mit denen sie dann Verkleiden spielen kann.


Tag 8

Die erste Sache, die fürs Verkleiden. Was passt besser zu einer 5-Jährigen, als ein Prinzessinnen-Kostüm? Hier ist der Anfang ein Cape. Ich habe darauf geachtet, dass sie die Sachen leicht an und ausziehen kann und dass sie noch eine Weile passen. Dieses Cape, der Anfang einer kurzen Prinzessinnen-Serie, kommt von Bev von Flamingo Toes, die bei Andrea's Serie Handmade Dress-Up von The Train to Crazy hier gepostet hat.


Tag 9

Ein Prinzessinnen Rock. Der Rock ist sehr lang und auch groß damit er noch etwas länger passt.


Tag 10

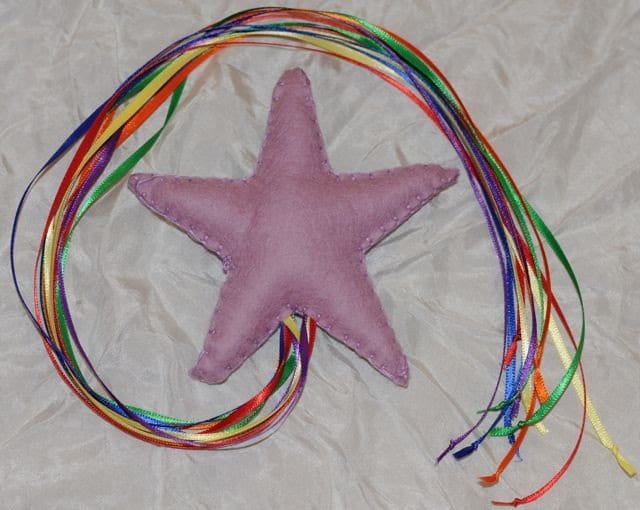
Und passend dazu einen Prinzessinnen-Stab

Auch aus Andrea's Serie Handmade Dress-Up von The Train to Crazy. Und den Link zum speziellen Post gibts hier.
Tag 11
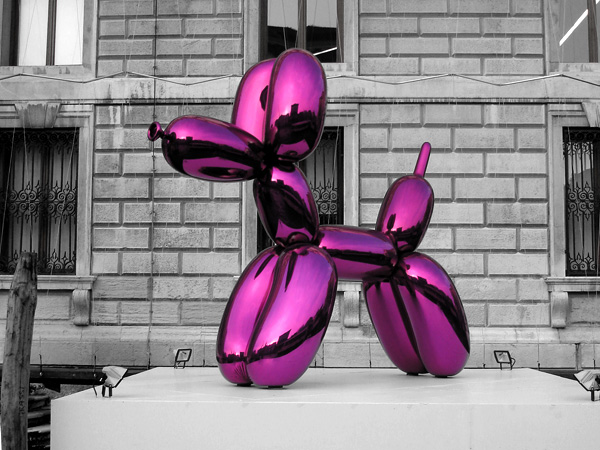
Wieder was nicht selbstgemachtes und ein Photo gibts eigenltich  auch nicht. Sie hat sich nämlich Luftballons mit Pumpe gewünscht. Und zwar nicht einfach irgendwelche Ballons, sondern die langen, aus denen man Tiere macht und damit dieser Tag nicht ohne ein Bild auskommen muss, stelle ich euch heute eines meiner Lieblingskunstwerke vor.


Es gibt ihn auch noch in anderen Farben. Sie sind von Jeff Koons und heißen "Balloon Dog". Ich liebe sie. Sie sind aus Edelstahl, obwohl sie sehr echt und unglaublich leicht aussehen. Einer hat sogar einen Auftritt in einem Film und zwar in "Nachts im Museum 2" hüpft einer dieser wunderschönen Hunde für ein paar wenige Sekunden durchs Bild.

Tag  12

Ein weiteres Verkleidungsteil für den Koffer.


Eine Piratenaugeklappe. Und damit hier jeder weiß, dass diese Piratenklappe von nem Mädchen ist, ist der Pirat mit einem Perlenpen draufgemalt...

Tag  13

Etwas Gekauftes! Ein Taschenspiegel, der auch in den Koffer mit reingeht. Leider ohne Bild.

Tag  14
 

Ein T-shirt mit einem Lollipop drauf. Tutorial findet man bei Disney von "Ruffles and Stuff"


Also das war es für heute. Ha, mal sehen wie lang ich brauche um den Rest zu posten... Oh je...


Hi,
So beforehand, Day 6 and 7 are not hand-made, but some of the others are.


Day 6
I bought this on the Christmas-Market in Nuremberg. This market is probably one of the only things Nuremberg is famous for.


You can buy those Santa Hats every year and sometimes they have a new kind. You know, glitter, different colors or with lights.
I thought that one was really cute and my niece already said she wanted a Santa Hat. She saw one a little while back in one of these Euro-Stores, but they looked really cheap and ugly. But when I came across these pink ones, I thougth I'd buy one of these. Though I think they probably are super easy to make. They're just two triangles, a long rectangle and a circle. Maybe next year I'll be making one of these.

Day 7

Day 7 isn't handmade either, but also not store-bought. This great vintage suitcase belongs to my grandparents and since they cannot travel anymore, I thought I'd give it to my niece. Isn't that a great present? No? Well, you see, this suitcase will be filled with dress-up things, throughout the next weeks. I thought this would be good, because she isn't great at role-play and maybe she'll be inspired or motivated to play by this suitcase.


Day 8

Here is the first dress-up item. And what's better than a princess-costume for a little five-year-old?
This a cape. This cape is from Bev from Flamingo Toes, who posted in series Handmade Dress-Up from The Train to Crazy. The link to the post is here.


Day 9

This is a matching skirt. It's kinda long and big, so it'll fit for a while.

Day 10

 Another Princess-Thing. A Fairy- aka Princesswand.


It's also from Andrea's series Handmade Dress-Up from The Train to Crazy. Aaaand the link is here.

Day 11

Again something not hand-made and I don't even have a photo. She wanted balloons, to be exact the kind you make balloon-animals from. But this day will not go without a picture. I am showing you one of my favorite work of art ever.


This dog comes in different colors as well and they are made by Jeff Koons. They are called "Balloon Dog" and they are made out of stainless steel. Although they look extraordinarily real and feather-light. One of them actually has an appereance in a movie. One of them is dancing through a scene in "Nights at the Museum 2".

Day  12

Another dress-up item.

A pirate mask. The skull is done with a pearly 3D-pen, so you know this belongs to girl ;o)

Day  13

Something bought. And without a picture. It's a little mirror and it's for the suitcase as well.

Day  14
 

It's a Lollipop-Shirt. The Tutorial can be found at Disney's "Ruffles and Stuff".

So this is it for today. Wonder, when I will post again... Please be patient with me.


Montag, 5. Dezember 2011

Advent Calender and Day 1, 2, 3, 4 and 5

 
Hi,
so it's been awhile since I've written something. I knew this was going to happen. I'm one of these people who start things and have hard time going through with it. But I am back, with lots and lots of things.
I made an advent calender for my niece and lots of the things, I put in it, are actually hand-made... So I'm going to show you aaalll the things one by one. Over the next month. Hopefully...
Advent calenders are a big thing over here in Germany, but maybe I have overdone it a little with the work I've put in, but it was worth it.
For my advent calender I was inspired by this one. I found it through Tip Junkie, who has a post about advent calenders.
It is from Infarrantly Creative and here is the link to the post.
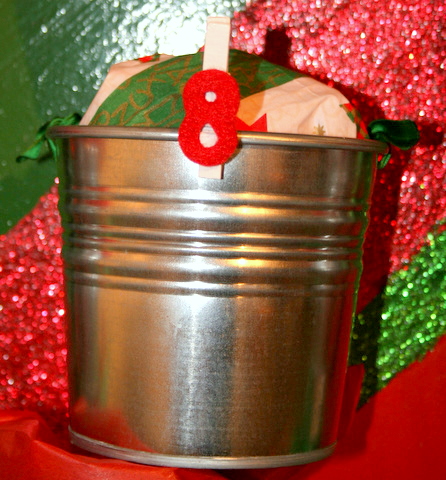
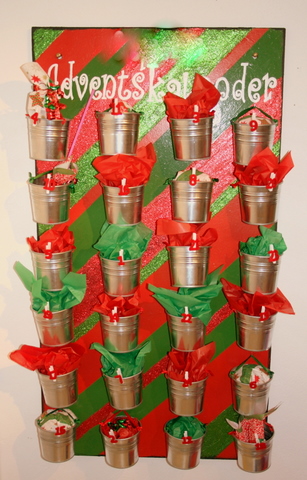
And here is my version. I couldn't find any little cheap pots with those holder thingis, so I improvised with ribbon.
 
Sorry, about the name, I had to blur it.
I also added green stripes and some of the stripes are glittered. Also I don't own a cutting machine, so I hand-wrote the letters. Not perfect, but I like them, anyway. The font is Curlz MT, that came with my Microsoft Word. It's great for Christmas, I think.
So now, let's start with the individual days

Day 1

Taaadaaa:
These are shooting stars and they are great for throwing. They fly really nicely. I love them! I was inspired by this Etsy-Shop-Item:


Day 2

 I love this frisbee. It's great for a boring rainy day.
and from the back:

The tutorial is from Tea Rose Home and you can find it here. This is her version:
I didn't use batting, I used the stuffing, that is used for stuffed animals and such.

Day 3
  I made another one of these shooting stars, because I thought one wasn't enough.

Day 4

This is one of the things I actually bought. It's one of these chocolate spoons, which dissolve in hot milk and become a delicious hot chocolate. But I have a recipe on Pinterest, if you like to make your own. Here it is and here is the link on Pinterest, in case you are Pin-Addict like me. 

 
Day 5 

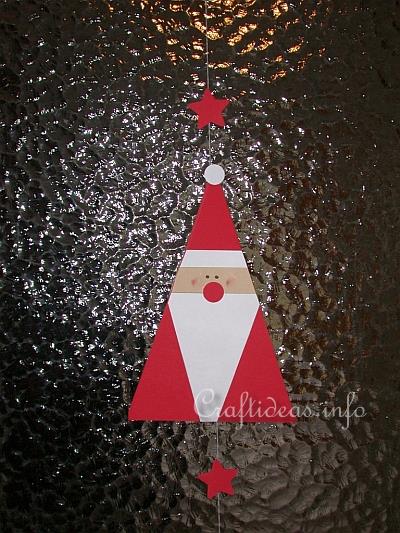
Many, many years ago my grandmother made me and my sisters little draw-string bags for St. Nicholas Day on Dec. 6th. On this day German kids put out one of their boots in the evening before that day so they can find a little gift from St. Nicholas on the morning of Dec. 6th. Our bags were blue and embroidered with Santa Claus, who for us comes on Dec. 6th not on Christmas (I will explain that later, if you want). Since I suck at embroidery (you can see that on the handstitches around the shooting stars, also I will not take all the blame, the thread was HORRIBLE), I made a different kind of bag. I was inspired by this paper Santa Claus found here

This is what I came up with:
And here is the Santa Claus. It's made out of felt and fur.

So this is it for today. If I can manage it, I will post on everyday of this december... We'll see, hope you'll stick with me, even if I disappear every once in awhile.
Have a happy pre-Christmas-time


Hi,
also es ist schon eine Weile her, dass ich was gepostet habe. Ich wusste schon, dass das passieren wird. Ich bin eine von diesen Menschen, die was anfangen und es dann schwer haben, die Sachen zu Ende zu bringen. Aber ich bin zurück und das sogar mit vielen, vielen tollen Sachen.
Ich hab einen Adventskalender für meine Nichte gemacht und die meisten Türchen habe ich sogar selber gemacht.  Und die werde ich euch zeigen. Ein Türchen nach dem anderen. Jeden Tag eins. Hoffentlich ;o)
Vielleicht hab ichs ein bisschen übertrieben mit den ganzen Sachen, aber irgendwie war des die Sache einfach wert.
Inspiriert worden, bin ich von diesem Adventskalender. Den hab ich von Tip Junkie, die haben einen tollen Post über Adventskalender.


Der hier ist von Infarrantly Creative und hier ist der Link zu diesem Post.
Und hier ist meine Version. Ich konnte leider keine billigen Töpfchen mit Henkeln dran finden, also habe ich mit Satinband improvisiert.
 
Tut mir leid, aber ich hab den Namen mit Picasa verpixelt.
Ich hab mich für Streifen auf dem Board entschieden, von denen einige auch noch beglitzert sind. Ich hatte auch keine Vinyl-Buchstaben, ich hab sie also per Hand geschrieben. Die Schriftart, die ich als Vorlage benutzt hab, ist Curlz MT. Die war bei meinem Microsoft Word dabei.
Also fangen wir jetzt an mit den einzelnen Türchen.

Tür 1


Taaadaaa:
Das ist eine Sternschnuppe, mit der man werfen und fangen üben kann. Sie fliegen wirklich wahnsinnig toll. Inspiriert wurde ich von diesem Etsy-Shop-Artikel:


Tür 2
 Ich liebe diese Frisbee. Die ist toll für einen langweiligen Regentag.
und von hinten.
Das Tutorial kommt von Tea Rose Home und hier ist der Link zu dem Post. Das ist ihre Version.
Ich hab Füllmaterial, das man für Stofftiere und so benutzt, verwendet, anstatt dem Quilt-Batting.

Tür 3
Und noch einen von diesen tollen Sternschnuppen (oder auch wie meine Mama sagt: Wurfsterne ;o))
Ich hab mir gedacht, eine Sternschnuppe ist nicht genug.

Tür 4
Hier kommt eins von den Sachen, die ich tatsächlich gekauft hab. Es ist ein Schokoladenlöffel, den man in heiße Milch taucht, um leckere heiße Schokolade zu bekommen. Ich hab allerdings auch ein Rezept zum Selbermachen auf Pinterest. Hier ist es und hier ist der Link zu Pinterest, falls hier jemand auch noch ein Pin-Addict ist, wie ich bin.


Tür 5 
Vor vielen, vielen Jahren hat meine Oma mir und meinen Schwestern Nikolaus-Beutel genäht. Sie sind blau und mit einem Nikolaus bestickt, aber leider bin ich ziemlich schlecht im Sticken (Beweise gibts oben, bei den Handstichen von den Sternschnuppen, aber der Faden war auch echt doof, also nehm ich nicht alle Schuld auf mich!)
Also für meine Tasche, habe ich mich von diesem Papier-Nikolaus inspieren lassen:


Und hier ist sie:

Und hier ist der Nikolaus noch genauer. Er ist aus Filz und Fell.
Ok, also das ist es für heute. Wenn ichs schaff, dann poste ich jetzt jeden Tag für den Dezember. Mal sehen, ob ich das schaffe.
Eine schöne Adventszeit an alle.


Print and PDF